
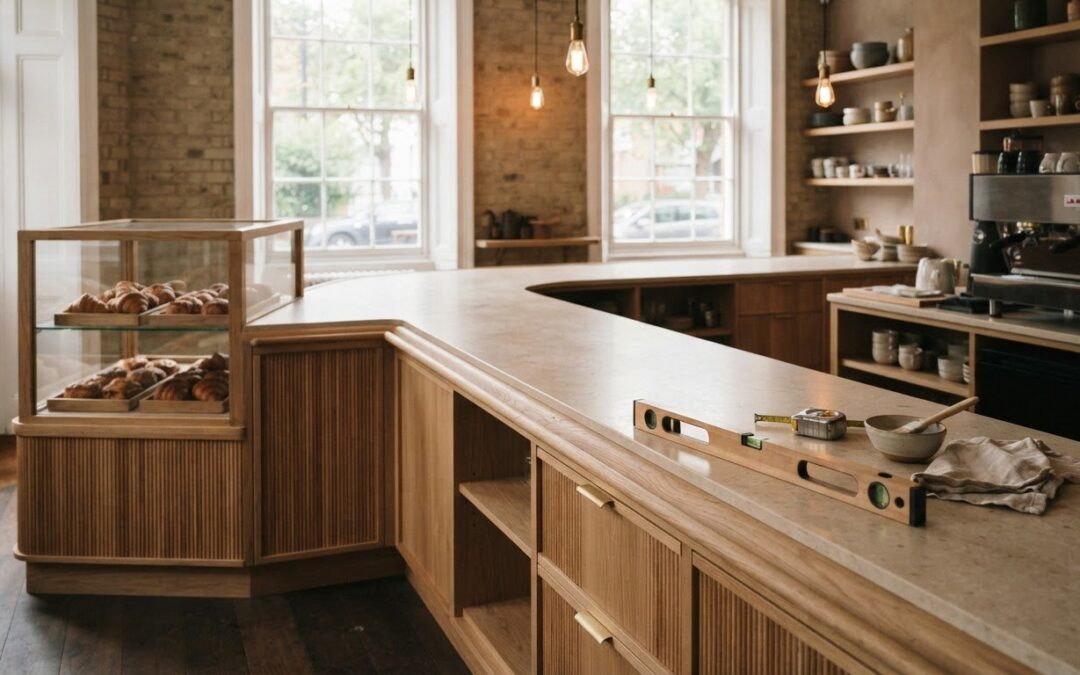
A larger counter is an upgrade only if it suits the way your team works. Upgrading from a countertop display to a full counter starts with measuring the available space and checking that the supporting base is sound and level. Then choose a surface suited to your service, prepare the countertop core and plan how to remove the old unit.
It’s easy to focus on the finished look, but careful preparation helps prevent a counter from obstructing movement, providing too little working space or becoming difficult to maintain. The dimensions and material should support your service routine as well as the appearance of the space.
This guide covers measuring the area, assessing and preparing the countertop core, comparing material upkeep and planning removal. Follow the steps from initial measurements through to a practical plan for the new counter.
Key Takeaways
- Measure the full footprint and note obstacles so the replacement counter fits the space and supports the way your team works.
- Assess the countertop core before preparing it; a clean, dry, smooth surface is essential for many finish options.
- Compare materials by their upkeep and resistance to heat, stains and everyday wear, not appearance alone.
- Plan the old countertop’s removal around its fixings, adjoining surfaces and any equipment that needs to be moved.
Measuring and preparing the countertop core
- Compare display and counter functions. A countertop display uses less floor space, while a full counter can combine customer-facing presentation with a larger work or storage area. Measure the footprint and map where staff serve, prepare and store items before choosing the layout.
- Establish permissions and access needs. For UK premises, consider lease terms, listed-building status and whether structural changes affect planning or building-control approval. Design an accessible route and a practical service point for customers with different mobility needs, without obstructing staff movement.
- List equipment and fittings. Identify the display or serving equipment, work surface, storage, power points and any required service connections. Place each item on a simple plan, allowing room for opening doors, cleaning and staff access.
- Plan the installation sequence. Record the existing counter dimensions, mark service connections and decide what must be disconnected before removal. Prepare the new counter’s footprint and fittings, then coordinate removal, positioning and reconnection in that order.
- Check the old surface before covering it. Film needs a smooth, clean, dry countertop without water damage or warping. Contact paper measuring 24 inches wide won’t cover a standard 2-foot-deep counter fully, so plan seams or choose a suitable width.
- Prepare laminate carefully. Clean the surface and let it dry, then lightly sand it with 220-grit sandpaper before painting. Peel-and-stick coverings won’t correct damage; contact paper also won’t adhere to an unlaminated underside without waterproof glue.
- Build or finish the core methodically. A countertop core can use two sheets of 3/4-inch fibreboard, with 3-inch-wide strips of 3/4-inch fibreboard around its perimeter. For film, warm the adhesive with a hairdryer for about 10 seconds to help wrap corners. This transformation works best when each edge is aligned before pressing the film down.
- Plan for operational disruption. Installation time depends on removal complexity, access and service connections. Schedule the work around trading needs, and organise the sequence to limit downtime rather than assuming every counter can be replaced in the same timeframe.
Material durability and maintenance
- Match the material to daily use. List the counter’s exposure to heat, spills, cleaning and frequent handling. During a renovation, a durable surface should suit the work routine, not just create a creative visual transformation.
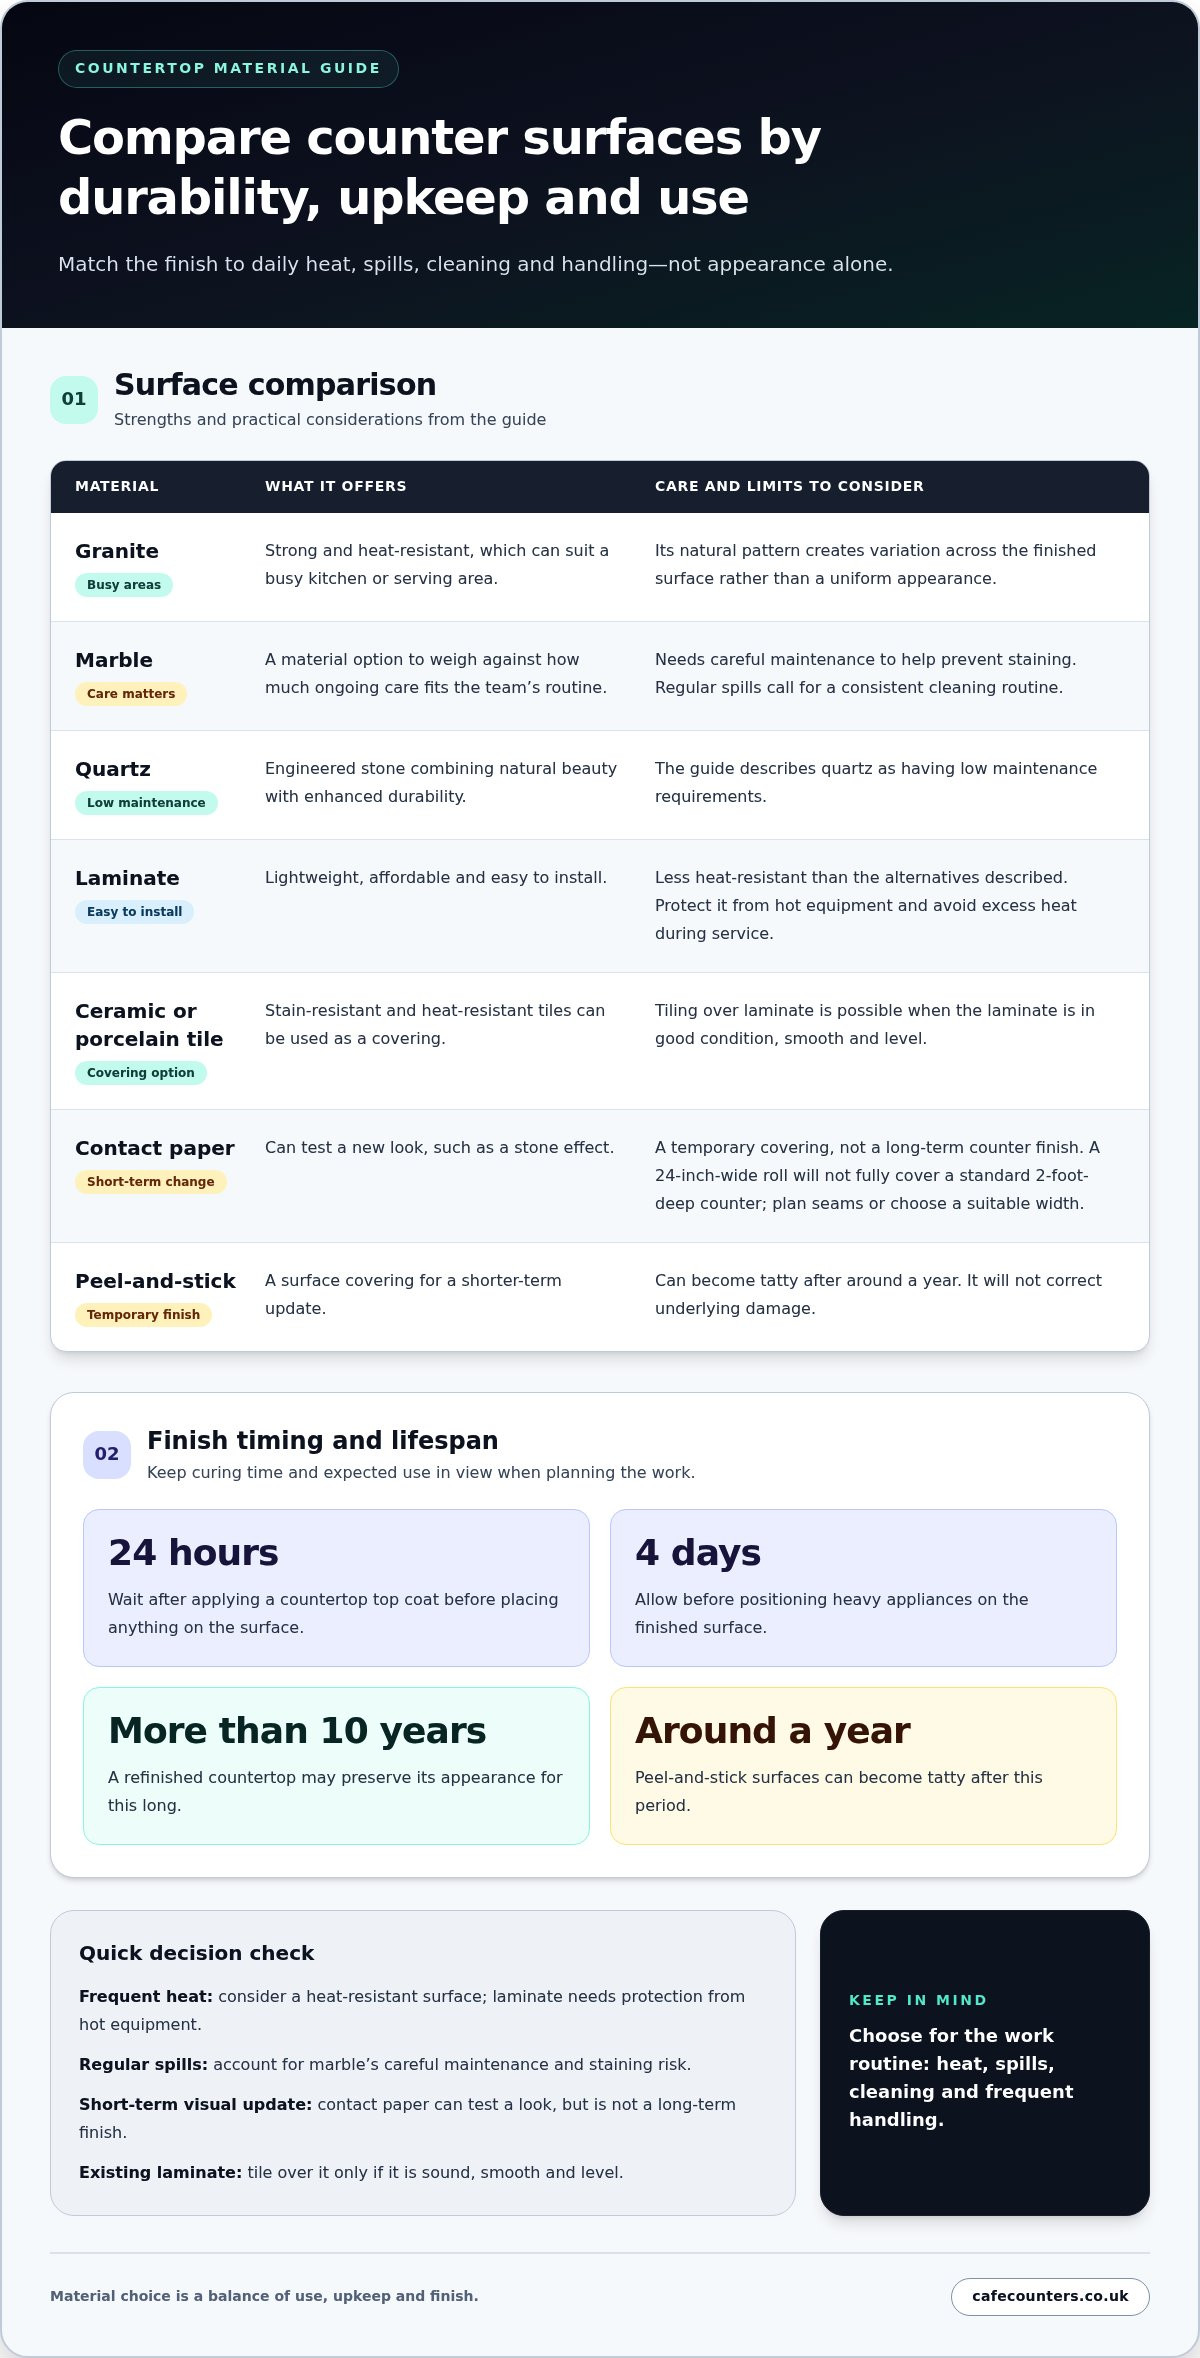
- Consider granite for demanding areas. Granite is strong and heat-resistant, qualities that can suit a busy kitchen or serving area. Its natural pattern also means the finished surface has variation rather than a uniform appearance.
- Factor marble’s care into the decision. Marble needs careful maintenance to help prevent staining. If the counter will regularly encounter spills, plan a consistent cleaning routine and consider whether that upkeep fits your staff’s daily tasks.
- Compare quartz with laminate. Quartz is engineered stone, combining natural beauty with enhanced durability and low maintenance requirements. Laminate is lightweight, affordable and easy to install, but is less heat-resistant, so protect it from hot equipment.
- Use temporary coverings for short-term changes. Contact paper can test a creative look, such as a stone effect, but it’s a short-term covering rather than a long-term counter finish. Peel-and-stick surfaces can become tatty after around a year.
- Check the finish’s curing time. After applying a countertop top coat, wait 24 hours before placing anything on the surface. Allow 4 days before positioning heavy appliances, so installation doesn’t put premature load on the finish.
- Choose cleaning methods to suit the surface. Use a routine that removes food residue without unnecessary abrasion. For marble, careful upkeep helps limit staining; for laminate, avoid exposing the surface to excess heat during service.
- Weigh replacement against refinishing. A refinished countertop may preserve its appearance for more than 10 years, while surface coverings suit shorter updates. For a commercial counter, compare upkeep and working demands with commercial counter options before settling on a finish.
If the laminate is in good condition, smooth and level, you can tile over it. Choose stain-resistant, heat-resistant ceramic or porcelain tiles for the covering.
Measuring available space
- Measure the complete footprint. Use a tape measure to record the proposed counter’s length and depth, including any return. A project covering about 40 square feet shows why the full footprint matters, not just the customer-facing edge.
- Record the original layout. Sketch walls, doorways, columns and nearby cabinets before planning the makeover. Mark fixed obstructions clearly, then compare the drawing with the actual space so the new counter doesn’t block access or working routes.
- Map staff and customer movement. Trace how customers approach the service point and how staff move behind it. Use the entrance, queue direction and nearby equipment as practical reference points; a counter that fits physically can still disrupt daily service.
- Check the working side. Measure the area behind the proposed counter and note doors, drawers and equipment that need operating space. For example, mark where a cabinet door swings before deciding the counter’s position or finished depth.
- Locate services and connections. Mark existing power outlets and any water or drainage connections on the sketch. Their positions can affect the counter layout, particularly if the replacement includes equipment that needs a service connection.
- Allow for the chosen finish. Include the thickness of the finished surface when planning the final height and edge position. Marble or another resistant material may change the edge profile, so measure from the support structure as well as the top.
- Check corners and transitions. Measure wall angles and note where the counter meets a cabinet, display or doorway. A simple plan should show these junctions, helping prevent awkward gaps and preserving access for cleaning around the installation.
- Verify the plan on site. Recheck each measurement against the original space before ordering or cutting components. Mark the proposed footprint on the floor with removable tape; this makes clear how the finished counter will affect movement and sightlines.
Removing the old countertop
- Clear and document the work area. Remove stock, tools and loose fittings from the counter and surrounding floor. Photograph the existing kitchen countertops, including each corner and joint, so you can record the original arrangement before dismantling.
- Protect nearby surfaces. Cover cabinets and flooring, then secure a clear route for carrying removed sections away. Keep the replacement materials separate from debris to prevent scratches, chips or dust affecting the new finish.
- Identify what holds the top in place. Inspect underneath for brackets, screws, adhesive or sealant. Note how the countertop meets walls and cabinets, since forcing a fixed edge can damage adjacent surfaces.
- Remove fittings carefully. Take off trim, upstands and accessible fixtures before lifting the main surface. Keep reusable fittings together and label them; this helps if the replacement layout uses the same positions.
- Release the countertop in stages. Work along the edges, loosening visible fixings before separating sealed joints. Use a suitable hand tool carefully, especially at a corner where a blade or lever could mark a cabinet or wall.
- Lift with controlled support. Once fastenings are released, raise the top evenly and keep it supported as it comes away. Large or awkward sections need coordinated handling, rather than pulling one end and risking a sudden break.
- Inspect the exposed base. Remove loose adhesive and debris, then look for damp patches, movement or damage. A clean, sound support gives the replacement a stable foundation; painting over scratches or covering a damaged area won’t fix the underlying problem.
- Prepare the next stage. Clear the work area and compare the exposed footprint with your measurements before installing the new counter. If the layout needs a new serving surface, plan a bespoke serving counter around the space and the way staff work.
Thinking about end-of-life handling while selecting a replacement can complement checks on fit and finish. Quartz countertops are 100 percent recyclable when removed in the future. Record the material selected with the project notes, so anyone handling a later removal can identify it. Keep that information with the layout and product details for the next stage of planning.
TFSE Products: Patisserie Displays
TFSE Products Ltd offers Patisserie Displays for businesses planning a dedicated counter to present patisserie. They may suit a layout or service that a countertop display no longer supports. For a broader arrangement, consider Integrate Drop-in Units, Grab & Go Displays and Salad Bars as part of your space plan.
Let your measurements, service workflow and maintenance priorities guide your choice. A clear plan connects the counter’s purpose to the available space, rather than relying on appearance alone. Share your project requirements with TFSE Products Ltd to discuss a suitable counter design.
Contact TFSE Products Ltd or visit cafecounters.co.uk to discuss your counter project.
Shape the counter around your next stage
Upgrading from a countertop display to a full counter gives you the chance to shape how customers encounter your products and how staff serve them. Before settling on a layout, decide what the counter needs to do: present products clearly, support quick selection or create a dedicated service point. That priority gives the design a practical purpose and keeps visual choices connected to everyday use.
TFSE Products Ltd offers Patisserie Displays, Integrate Drop-in Units and Grab & Go Displays. Each supports a different approach to product presentation, so consider how customers browse and choose in your space. A clear brief about your service style and intended layout will help focus the design discussion.
Take the next step with a considered plan. Contact TFSE Products Ltd for help with planning your counter upgrade, and move forward with confidence.
Frequently Asked Questions
What does upgrading from a countertop display to a full counter involve?
Upgrading from a countertop display to a full counter changes how products, staff tasks and customer service fit together. For example, a shop moving from a single pastry display may need a continuous presentation area that also supports serving and payment, incorporating dedicated EPOS hardware from OXHOO alongside food displays. Think about how customers approach the products and where staff carry out each task. This helps ensure the larger counter improves the service sequence instead of simply adding surface area.
What are the dimensions and space requirements for a full counter?
There is no single set of dimensions for every full counter. The required footprint depends on its purpose and equipment. Distinguish the overall counter footprint from the usable worktop, since display or storage components take up some of the surface. A counter for a particular product range may need a different configuration from one focused on serving. Use your equipment and service routine to establish suitable proportions.
How long does a full-counter installation take, and what disruption should a business expect?
The time required depends on removal complexity, access and service connections. Schedule the work around trading needs, and coordinate removal, positioning and reconnection to limit downtime.